Introduction
Microsoft Search shows the content that your organization has stored in the Microsoft 365 Tenant or indexed through connectors.
Service Now knowledge-base articles can also be visible to all users within your organization. After you complete the connector configuration, end users can search for those articles from any Microsoft Search client.
In this article, we'll understand how to index the "Service Now " knowledge base article using Graph Connector in Microsoft Search Results.
License Requirements
To view data from connectors in your search results, users must have one of the following Microsoft 365 or Office 365 subscriptions:
- Microsoft 365 or Office 365 Enterprise E3 or E5
- Microsoft 365 or Office 365 Education A3 or A5
Let's start with the configuration steps.
Step 1 - Navigate to Connectors
- Go to Microsoft 365 admin center.
- In the navigation pane, go to Settings.
- Select > Microsoft Search.
- Select > Connectors
- Select > + Add
Step 2 - Select Azure DevOps as a Data Source
Microsoft has seven connectors available to connect with an external data source and several partners released connectors to connect with an external data source
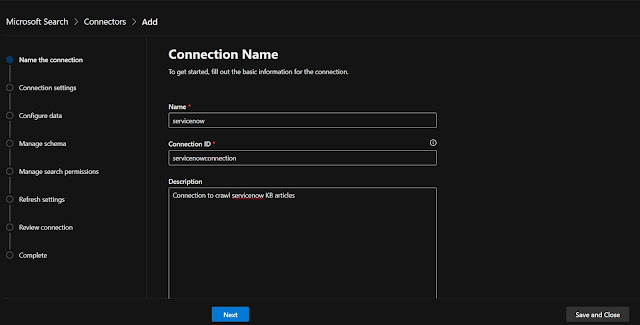
Step 3 - Fill connection name details
- Name (mandatory)
- Connection Id (mandatory)
- Description (optional)
Step 4 - Configure settings
To connect ServiceNow data, you need your organization's ServiceNow instance URL.
Your organization’s ServiceNow instance URL typically looks like https://<your-organization-domain>.service-now.com
To authenticate and sync content from ServiceNow, choose one of two supported methods:
- Basic authentication
- OAuth (recommended)
Note
For demo purposes, I used basic authentication.
To create a service now instance, you need to follow this link.
Step 5 - Configure Data
Select a project in the organization to crawl
Edit properties, if more properties need to added, click preview > next to proceed.
Step 6 - Manage Schema
You can choose which column can be set as Querable, Searchable & Retrieve. It is the same standard schema configuration as SharePoint Search.
Step 7 - Manage Search Permissions
You can choose to use the ACLs specified in the full crawl screen, or you can override them to make your content visible to everyone.
Step 8 - Content Refresh Settings
You can configure the incremental and full refresh intervals.
Step 9 - Review connection and complete
All defined configurations can be reviewed and modified here. Once it's complete, click Finish to proceed.
Step 10 - Review connection and complete
Wait for a couple of minutes and the connection content will full crawl. The connection state will also change from Publishing to Ready. Once the connection state is ready, two actions need to be performed in sequence:
1. Create Result Source.2. Create Vertical.
Result Type
A search result type is a rule that causes distinct kinds of search results to be displayed in different ways. It consists of the following:
- One or more conditions to compare each search result against, such as the content source of the search result.
- A result layout to use for search results that meet the conditions. The resulting layout controls the way that all results that meet the conditions appear and behave on a search results page.
Step 11 - Result Type Section
Once you select create result type, follow the simple steps to follow a naming convention. Enter the result type name
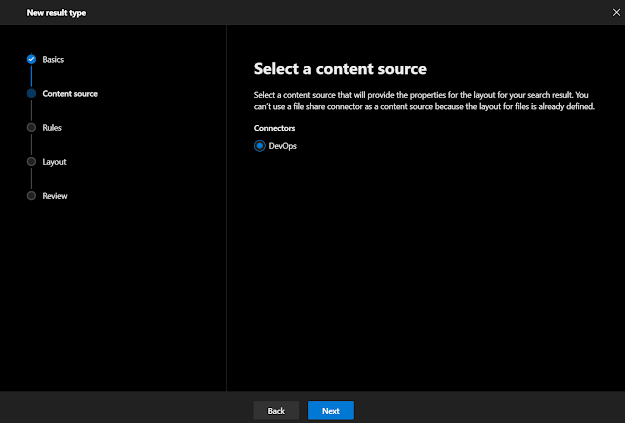
Step 12 - Result Type Content Source
Select the appropriate content source so that crawled or configured data can be mapped properly.
Step 13 - Design Layout
These are the important steps to design your layout or adaptive rich card, which will be rendered into search results.
Once you click "Launch Layout Designer", it will navigate to https://searchlayoutdesigner.azurewebsites.net/
Step 14 - Search Layout Designer
Select a blank layout and design the required card.
Copy content from the Layout Payload editor and paste it into step no. 13.
Layout payload editor added to the GitHub link here
Review the result type configuration and proceed to Vertical creation to map with defined result type.
Manage Vertical
Verticals make it easier for users to find the information that they have permission to see.
You can add search verticals that are relevant to your organization. These will appear on the Microsoft Search results page in SharePoint, Office, and Bing.
Before you start, make sure that the connector has been indexed. This can take up to 48 hours, depending on the file size.
You can’t create a vertical for content that resides in SharePoint.
There are three basic steps to add a vertical:
- Create the vertical. In this step, you define the vertical’s name, content source, and scope of the content to search.
- Define what the results for this vertical will look like.
- Enable the vertical (to be displayed) from the vertical list page.
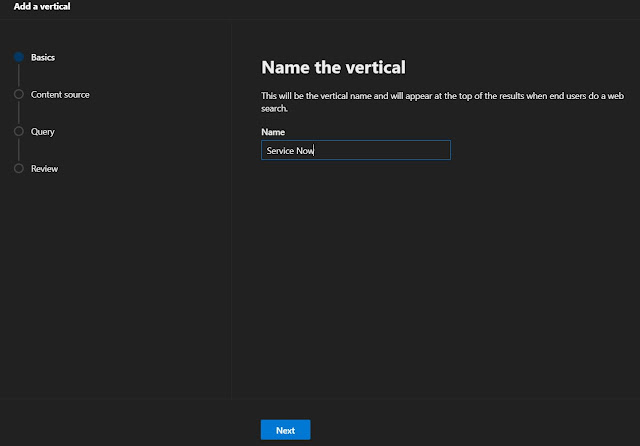
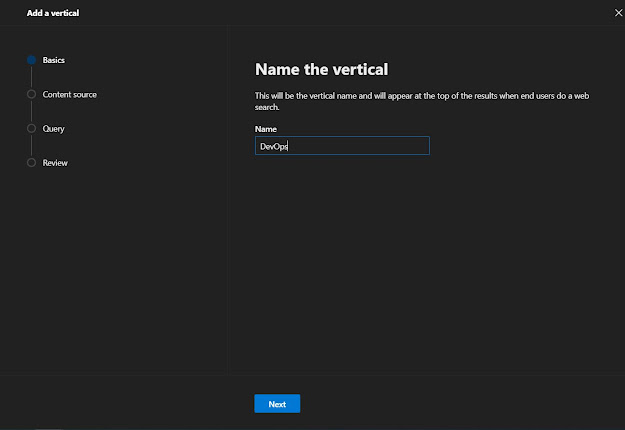
Step 15 - Create Vertical
In the navigation pane, go to custom connector and then select the Verticals Link.
To add a vertical, select Add, or to edit a vertical, select it in the list.
Remember that verticals are created in a disabled state. They must be enabled before users can see them.
Add the required Query section as it is an optional section. Proceed to review, Add, and Enable vertical via the following screens.
Outcome
Service Now Data Screen Shot
Finally, we receive the Output in Microsoft Search
Related Article:-
Same article published here also
I hope you have enjoyed and learned something new in this article. Thanks for reading and stay tuned for the next article!


