Introduction
Let's understand Microsoft Search and how it works:
- Microsoft Search is a secure way to search both your intranet and web content.
- Microsoft Search indexes all your Microsoft 365 data to make it searchable for users. When a user executes a search, Microsoft Search pulls results from data sources in Microsoft 365, including SharePoint Online, OneDrive, Teams, Yammer, and organizational and directory service information.
- Microsoft Search uses insights from the Microsoft Graph to show results that are recent and relevant to each user.
Microsoft Search BookMarks
If your organization uses a promoted results set, you can use Bookmarks to do the same. A bookmark can have several keywords and several bookmarks can share the same keyword, but a reserved keyword can't be shared. When a Bookmark is created or modified, the search index is refreshed immediately, and the bookmark is available to users immediately.
Microsoft Search Bookmarks integrated with Power Apps makes the search experience much more interactive.
Simply put, users search for a topic or keywords that are defined as keywords with the associated app. On the keyword or topic search, the user can launch the app within Microsoft Search.
Step1 - How to add/edit a bookmark
- Go to the Microsoft 365 admin center.
- In the navigation pane, go to Settings.
- Select > Microsoft Search.
- Select > Answers.
- Select > Bookmarks.
- To add a bookmark, select Add new. To edit a bookmark, select the bookmark in the relevant bookmark list.
Step 2 - Create a PowerApps application
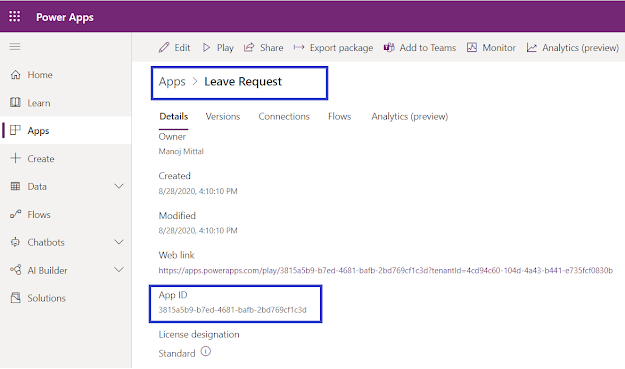
i.e. Leave Request > Save -> Publish. Note down the powerapp ID to configure into Microsoft search.

Note
To get an understanding of Power Apps, visit the previous reference article here.
Step 3 - Configure the Bookmarks with Power Apps
- Add Title > It will be shown in the bookmark result.
- Add Url > It will navigate to a reference document or link.
- Bookmark description > Add bookmark description, it will be shown the description of the bookmark.
- Keywords > it used to find this page.
- Reserved Keywords > It should be unique and the same used to get the result based on unique keywords
- Categories > it helps to organize or group the keywords.
- Get App ID for the Power App that you want to add from step no.2.
- Select Power App, and then Add a Power App ID.
- Height and width are automatically adjusted. Bookmarks can support both portrait and landscape orientations, but currently, the size can't be changed.
Select Publish or Save to Draft.
Step 4 - Publish the Bookmark
Once the bookmark gets published, it will start appearing as below. Bookmark gets indexed quickly and is available for use immediately. Finally, you can define keywords into the search box and a bookmark will appear with an integrated Power App link.
Summary
I hope you have enjoyed and learned something new in this article. Thanks for reading and stay tuned for the next article.


No comments:
Post a Comment