Office 365 CDN
Office 365 CDN (content delivery network) played a vital role in reducing the network traffic and fastest rendering of the content. It comprises the Private origins CDN and Public origins CDN.
As images are now automatically managed in a SharePoint Online service-managed Private CDN, the manually configured Private CDN is being deprecated. This means that customers no longer need to configure. Reference article here.
Problem Statement
Custom Control (SPFx) renders or displays multiple images which is part of List not part of SPFx solution itself. So content should allow to change later point of time. It cause multiple network call to each render image and lead to performance issues.
Way to achieve the solution
Let's begin to enablement of Private CDN to optimize and reduce the network traffic and configure the codebase accordingly.
Step 1. To validate the Private CDN
- Get-SPOTenantCdnEnabled -CdnType Private: return True or False (false means not enabled)
- Get-SPOTenantCdnOrigins -CdnType Private: return the path of the origin (blank means not configured and doesn't exist)
- Get-SPOTenantCdnPolicies -CdnType Private: return the defined or configured policies.
Step 2. Configure the Private CDN
- Set-SPOTenantCdnEnabled -CdnType Private
- Press A to confirm the CDN enablement at the Tenant Level
- Private CDN-enabled locations start appearing
- Validate Private CDN enablement with Get-SPOTenantCdnEnabled -CdnType Private (True means private CDN enabled)
Step 3. Create a List with an Image DataType
SharePoint Online List structure with the below columns
Step 4. List Image Storage
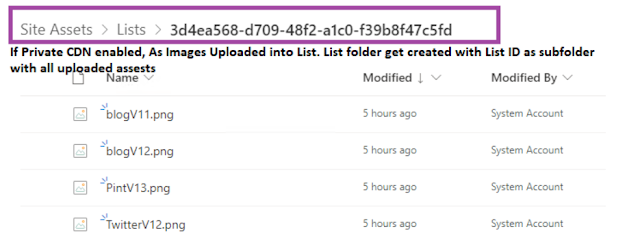
All List images under the image column get stored in Site Assets automatically. Once you navigate to Site Assets, Sub Folder will get created with the name Lists and a further subfolder with List ID with all images.
Note. As Private CDN is enabled or enabled automatically, Site Assets origin is set CDN enabled library or folder.
Step 5. Get List Items into the TSX file
Create a state variable type array i.e. footeritems array , and bind the list data within the array using setState.
Step 6. To Convert the source Image Url to CDN, enable the URL using ImageHelper
import { ImageHelper } from "@microsoft/sp-image-helper";
Create a function that takes the source Url and returns the CDN-Enabled Url.
ImageCdnUrl(originalImageUrl : string) { return ImageHelper.convertToImageUrl( { sourceUrl: originalImageUrl, // important width: 80 // up to requirement, size can be set } ); }
Finally, Render Method.
public render(): React.ReactElement<IFooterProps> { return (<> { <section className={`${styles.footer} ${this.props.hasTeamsContext ? styles.teams : ''}`}> <h1 className={`${styles.title}`}>{this.props.description}</h1> <div className={`${styles.socialMediaLinks}`}> {this.state.footerItems.map((fLink, i) => { return ( <> <a target="_blank" href={fLink.FooterUrl?.Url} data-interception="off" rel="noreferrer"> <img alt={fLink["Title"]} src={this.ImageCdnUrl(JSON.parse(fLink.FooterImage)?.serverRelativeUrl)} /> </a> </> ); }) } </div> </section> }</> ); }
Step 7. Let's build the package, deploy the solution to the app catalog, add a webpart to the page, and validate the Image render path.
I ran the below command to deploy the package.
- Gulp Build
- Gulp Bundle --ship
- Gulp Package-Solution --ship
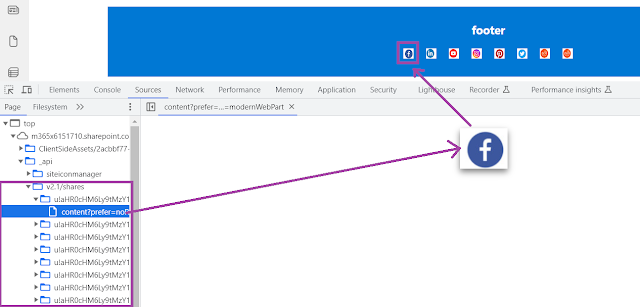
Once the solution is deployed, the web part is added to the page. Inspect the images; we can see all control images redder from Private CDN. It will improve the network traffic with one call instead of multiple.

Hope you have learned something useful here.


