Part one :- FAQ based Bot Application Using QnA Maker - Part One
I have explained how to build FAQ based bot application using QnA maker for questions and answers. In this article, we will discuss about how setup Bot Framework development environment and we are going to consume QnA maker service.
This article will walk you through “How to Setup a Bot Framework development environment using .Net (C#)” and test the bot application using Bot Framework Emulator.
Prerequisites
• Install Visual Studio 2017 for windows
• Update all extensions with latest versions
• Download Bot Application (.zip) file
Navigate and place the Bot Application.zip template to below path
%USERPROFILE%\Documents\Visual Studio 2017\Templates\ProjectTemplates\Visual C#\
• Download Bot Controller (.zip) file and Download Bot Dialog.zip file
Navigate and place the Bot Controller.zip and Bot Dialog.zip template to below path
%USERPROFILE%\Documents\Visual Studio 2017\Templates\ItemTemplates\Visual C#\
Launch the Visual Studio
Once you launch the Visual Studio 2017 and navigate to file -> new project -> You can get Bot Framework Template under Visual C# Template


Note
I recorded the complete article available at my youtube channel.
I have explained how to build FAQ based bot application using QnA maker for questions and answers. In this article, we will discuss about how setup Bot Framework development environment and we are going to consume QnA maker service.
This article will walk you through “How to Setup a Bot Framework development environment using .Net (C#)” and test the bot application using Bot Framework Emulator.
Prerequisites
• Install Visual Studio 2017 for windows
• Update all extensions with latest versions
• Download Bot Application (.zip) file
Navigate and place the Bot Application.zip template to below path
%USERPROFILE%\Documents\Visual Studio 2017\Templates\ProjectTemplates\Visual C#\
• Download Bot Controller (.zip) file and Download Bot Dialog.zip file
Navigate and place the Bot Controller.zip and Bot Dialog.zip template to below path
%USERPROFILE%\Documents\Visual Studio 2017\Templates\ItemTemplates\Visual C#\
Launch the Visual Studio
Once you launch the Visual Studio 2017 and navigate to file -> new project -> You can get Bot Framework Template under Visual C# Template

You can create a bot application using Visual Studio Bot Application template or Download the Bot Application solution created by Azure Portal using Bot Framework SDK. In previous article, I have created the bot application in azure portal. I am going to download and update the solution.
Step to get the Microsoft Azure Bot Application Solution
1. Login to Azure Portal i.e. https://portal.azure.com and search for created bot name (my bot name is bot2018).
2. Select Web App Bot and you will navigate Web App Bot detail page.

3. Select Build under Bot Management
- Online Code Editor Option open the codebase into visual studio online.
- Download the source code using Download Zip file option.
Select second option i.e. Download

4. Once you download the solution. Unzip the source code. Launch the Visual Studio 2017.
5. File -> Open Project -> Select the solution.
6. Expand the Reference Section -> All DLL or Packages link will be in broken mode and need to update with latest version and packages.

7. Right Click the project and Select Manage NuGet Packages and wait for couple of seconds.
NuGet Package Manager will show the available updates. Select all packages and click Update.
8. Update Microsoft.Net.Compliers V2.6.1 to V1.2.1
9. Add Key and Value under App Setting in Web.Config file.
AzureWebJobsStorage, QnASubscriptionKey, QnAKnowledgebaseId. These values can be get from Azure Bot Application App Service Settings.
- <add key="AzureWebJobsStorage" value="DefaultEndpointsProtocol=https;AccountName=bot2018019ada;AccountKey=TPainlj4hGSND3IjYuyP5234m5;"/>
- <add key="QnASubscriptionKey" value="2b523241d6b4a5c105a6e0ad7e"/>
- <add key="QnAKnowledgebaseId" value="453c2a2d-b423-4816-8544-130edf0f593"/>
2. Navigate to Project -> Dialog folder -> Basic QnADialog.cs file. Replace below section two places using find and replace.
- Replace -> Utils.GetAppSetting("QnAKnowledgebaseId") with ConfigurationManager.AppSettings["QnAKnowledgebaseId"];
- Replace -> Utils.GetAppSetting("QnASubscriptionKey") with ConfigurationManager.AppSettings["QnASubscriptionKey"];
3. Press F5 or Run the solution. VS solution execute in the localhost with port number.

Test your Bot Framework locally
Download Bot Framework Emulator and install the executable.

Open installed Bot Emulator. Select ellipse and click the App Settings

Download ngrok and add the reference to app settings in Bot Framework Emulator and click save.

Response by Emulator
You can start asking the question as crawled by QnA Maker and you will prompt with response

Publish and test visual studio solution in the azure platform
1. Navigate to Azure Bot App Services and click Get Publish Profile.

2. Select Visual Studio Project -> Right Click -> Publish option.

3. Select “Create new profile”

4. Select Import file and click publish.

5. Solution success and publish at the Azure Bot website url.
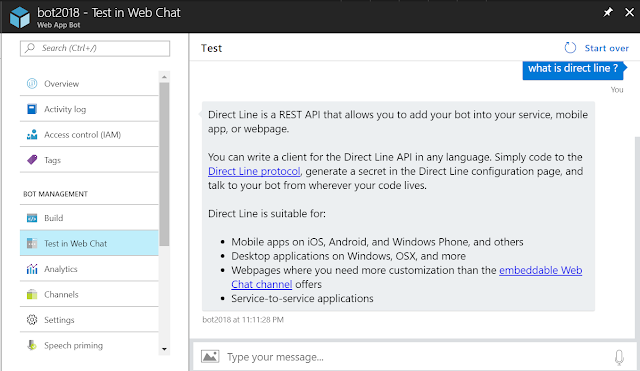
6. Test the bot framework in the azure portal.
Navigate to Azure Web App Bot and Select Test in Web Client under Bot Management section. You can start asking the question as crawled by QnA Maker and you will prompt with response.

Note
I recorded the complete article available at my youtube channel.