Introduction
In today's world, the configuration of networks is driven by the needs of users and business which have changed over time.
Organizations can't assume users will be in one place, rather they are on both internal and/or external networks. Users don't access networks with one device either, they have a myriad of devices and types of software architectures they use including on-premises apps, SAAS apps, mobile apps, and so on.
How are you as a developer supposed to properly secure your applications and your user's access to information across so many scenarios?
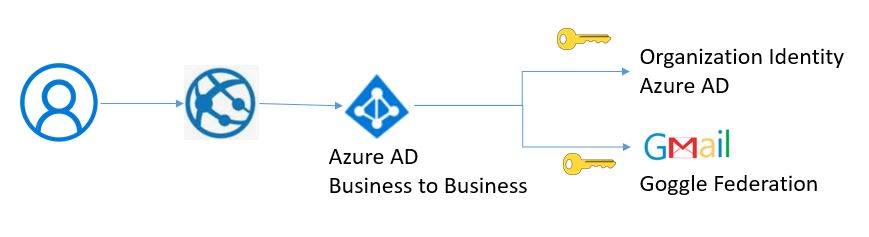
Let's understand how to set up a business-to-business application with External Identity, i.e. Google Federation.
External Identities is a set of capabilities that enables organizations to secure and manage any external user, including customers and partners. Building on B2B collaboration, External Identities gives you more ways to interact and connect with users outside your organization.
Note
Google Federation works with Gmail Account users.
Step 1 - Configure a Google Developer Project
Create a new project in the Google Developers Console to obtain a client ID and a client secret that you can later add to Azure Active Directory (Azure AD).
- Navigate to https://console.developers.google.com, and sign in with your Google account.
- Create a new project: On the dashboard, select Create Project, give the project a name (for example, Demp App ), and then select Open.


Step 3 - Configure Oauth Consent Screen
- Once the project is created, select your project.
- Select OAuth Consent Screen
- Select External
- Click Create

- Once the user clicks to create and navigate to App Information Screen
- Add an App Name i.e. Demo App
- Select the User Supported Email from DropDown

- Scroll and Add Authorized Domains and enter microsoftonline.com
- Add Developer Contact information
- Click save and continue to proceed.

Step 4 - Add Credentials details
Select Credentials, click create credentials and select "Oauth Client ID"

- Add Application Type as "Web Application" and give the application a suitable name.
- Under Authorized redirect URLs add:
https://login.microsoftonline.comhttps://login.microsoftonline.com/te/<tenant ID>/oauth2/authresp(where <tenant ID> is your tenant ID)

Now you will prompt with OAuth Client Created. Copy and Paste securely Client Id and Client Secret. It will be used to add an identity provider into Azure AD Portal.

Step 5 - Configure the Google Federation in Azure AD
- Navigate to https://portal.azure.com.
- Select App Registration -> New Registration
- To register an application add Name i.e. demoapp01 and leave other information as-is click to register.
- Navigate to External Identities and Click to "All Identity Providers"
- Select "+Google" to configure the federation.


Now the Google Federation configuration is done. Let's start with Application association with External Identities.
Step 6 - Configure User Flow
User flows that enable users to sign up, sign in, or manage their profile. (As of today, this feature is in public preview).
- Select User Flow and click to "+ New user flow".

- Add the name of the newly created flow, i.e. Demo App, and select the Federated Google Identity Provider

- The User flow has been created and associated with the Google Federation identity provider.
- For the associate application or Azure, add an instance created at step no.5. Select an application and proceed.

We are done with federated configuration and integration with an Azure AD Application, let's see how the output looks like now.
Output Screen 1
- As the user runs the application and clicks on the sign in button, a login prompt will appear, If user click "Create New or Sign In Option", a sign in with Google option will appear.
- As the user uses the google option to sign in, a request will go to Google and a Google sign in screen will appear
- Once the user enters their Google credentials, the application asks for minimal permission consent approval, which is the default setting to read the user profile from Google.
- As users accept the consent and social account as an external identity allowed to log in to the organization created, i.e. Business to Business Application.

I hope you enjoyed and learned something new in this article. Thanks for reading and stay tuned for the next article.
